Plate ‘n’ Sheet Development

Plate ‘n’ Sheet Professional Software unfolds a wide range of the steel plate and sheetmetal shapes commonly used in the sheetmetal, piping and steel fabrication industries. It is both fast and easy to use.
Ease of use and the comprehensive range of shapes and patterns offers flexibility and simplicity which saves the user time and money. It also reduces the possibility of mistakes and the subsequent loss of time, materials and money.
Overview
Plate ‘n’ Sheet Development is a software program designed to unfold shapes commonly encountered by fabricators and sheet metal workers. The dimensions and other parameters that define the shape are entered by the user and may be any reasonable value. These may be altered at any time and the appearance shape will change dynamically.
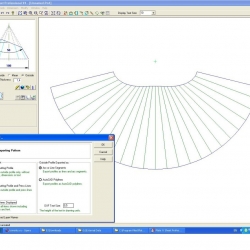
The shape may be viewed as either a 3D model or as a flat pattern at any stage of the process. Tools are supplied to zoom in or out to see the shape in detail. If it is being viewed as a model, several viewing angles (top, front, side, end and four isometric angles) are available at the click of a button and true length measurements may be taken from the model.
Where possible, error messages will let you know if a parameter is not valid for the shape being created.
Several dimensioning modes are available and the resultant pattern may be printed or exported as a DXF for use in other software.
Screenshots of Plate ‘n’ Sheet
(Click to enlarge)
The process of unfolding a shape
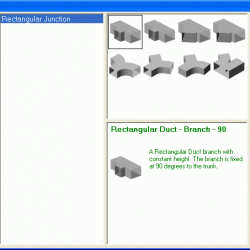
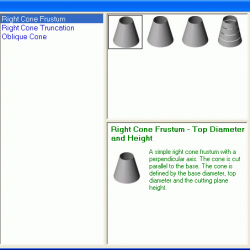
- Start the program and click the “New” button and select a category by clicking on one of the shape images.
- This will display a Model Window and a diagram of the shape with spaces for entering the dimensions. Use the left and right pointer buttons to scroll through the choices until you find the one that is the best match for the information.
- Enter the values that define the shape.
- View the 3D model by clicking any of the view buttons. If the model is not visible or partly off the screen click the “Zoom Extents”.
- When you are satisfied with the appearance of the model click the “Develop Pattern” button to view the pattern. You may alternate between model view and pattern view as you wish.
- Add dimensions if required. There are several different methods available, displayed in the “Dimension” pull down menu.
- Print the image to your Windows System printer or export a DXF file for use in a CAD program or profile cutter.
Developments can be produced quickly and easily by entering values such as diameter, height and angles into a user-friendly dialogue box.
There is no need to construct a 3D model. Quick results can be obtained by users with very little CAD experience.
Developments include:
- Branches,
- Oblique cones and Reducers.
- Lobster-back bends.
- Breech pieces
- Prisms Pyramids
- Right cone frustums
- Right cone truncations
- Pipe to cone branches
- Rectangle to round
- Oblique cylinders
- Elbows at any angle
- Transitions
- Auger-Screw
Plus more…
More Features
- Over 50 developments and variations
- Fast, accurate and simple to use
- Saves pattern as DXF for importing into most CAD programs
- Automatic dimensioning
- Full size patterns may be printed across multiple sheets
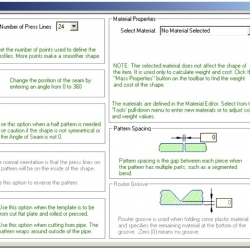
- Allowances may be applied for material thickness and overlapping seams
- Rendered 3D models and unfolded patterns may be transfered directly to AutoCAD if installed
| The following is a list of currently available categories: | ||
|
|
|
Viewing the model or pattern:
Pan
Use “Pan” when you wish to center the image on the screen. Pan moves the field of view without changing the magnification. While the model or pattern appears to move on the screen, it is important to realize that the field of view is all that is changing and that the coordinates of any point on the model do not change.
Zoom Window
Use when you wish to magnify a part of the model or pattern to get a closer look at it. Pick the diagonal corners of a box or window around the area you wish to examine. Note: After picking the first corner with the left mouse button, hold the button down and release it when the window is the correct size. The area inside the window is enlarged to fill the screen. A message is disolayed when the limits of magnification are at the maximum.
Zoom In
Use when you want a closer look at the image on the screen. For example if the image is too small, use zoom in to enlarge the image on the screen. As with other display functions, it is important to realize that only the image is getting larger, measured distances and dimensions on the shape do not change. It is similar in principle to viewing an object through a magnifying glass.
Zoom Out
Use when you wish to make the image appear smaller on the screen. See also Zoom In.
Zoom Extents
Use when you wish to zoom the image so that it is as large as possible while still fitting all of the image onto the screen.
Zoom Previous
Return to the previous zoom or panned state. You may “zoom previous” repeatedly until you eventually return to the first view of the item
Add to cart
